Based on the research I have done, here is the bodycopy:
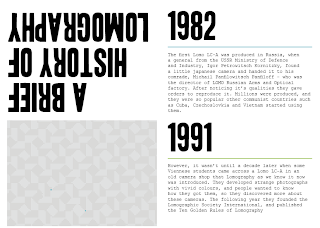
History of
Here is how it all started..
1982
The first Lomo LC-A was produced in Russia, when a general from the USSR Ministry of Defence and Industry, Igor Petrowitsch Kornitzky, found a little japanese camera and handed it to his comrade, Michail Panfilowitsch Panfiloff - who was the director of LOMO Russian Arms and Optical factory. After noticing it's qualities they gave orders to reproduce it. Millions were produced, and they were so popular other communist countries such as Cuba, Czechoslovkia and Vietnam started using them.
1991
However, it wasn't until a decade later when some Viennese students came across a Lomo LC-A in an old camera shop that Lomography as we know it now was introduced. They developed strange photographs with vivid colours, and people wanted to know how they got them, so they discovered more about these cameras. The following year they founded the Lomographic Society International, and published the Ten Golden Rules of Lomography:
- Take your camera everywhere you go
- Use it any time – day and night
- Lomography is not an interference in your life, but part of it
- Try the shot from the hip
- Approach the objects of your Lomographic desire as close as possible
- Don't think (William Firebrace)
- Be fast
- You don't have to know beforehand what you captured on film
- Afterwards either
- Don't worry about any rules
1994
Their website, lomo.com, is introduced, allowing lomographers across the globe to discuss and share their lomographs.
They also had their first exhibitions in New York and Moscow, showcasing lomowalls. Lomowalls are a collection of thousands of lomographs put together on a wall, creating an overwhelming experience for the viewer.
1997
The website is updated, renamed to Lomography.com, and boasts a shop to buy cameras and accessories; activities; forums; articles and much more, making lomography a thriving community.
Madrid also held the first Lomographic World Congress, with a Lomowall 120 metres long - featuing more than 35,000 lomographs.
1998
The Actionsampler is introduced by the Lomographic Society International, and has four lens. This is one of the cameras featured in this book with examples of photographs it can take.
2000
The Supersampler is introduced, a camera which takes four panoramic images in one photograph.
LomoHomes was introduced on Lomography.com so that people could showcase their own lomographs and make their very own lomowalls.
2001
In Vienna, the first Lomography store opened, with lomowalls covering the shop. It sold lomography products as well as holding workshops and activities for people to do.
2003
Along with photography products, a bag called The Sidekick TPE was introduced to the Lomography range. This kickstarted a further range of accessories to be brought in, such as clothing, camera bags and keychains.
2005
The fisheye camera is introduced this year, it pans nearly 180 degrees in 35mm. This is another camera that this book will be featuring photographic examples of.
2006
The production of the original Lomo LC-A is stopped, and replaced with the improved Lomo LC-A+. The camera is now made in China, and offers a more improved design featuring a multiple exposure button.
2007
The Diana+ is introduced by the Lomographic Society International. New stores also opened in Paris, Seoul and Hong Kong. A limited edition of the Holga and Diana+ cameras were introduced in collaboration with The White Stripes.
2008
A convention was held at Photnika in Germany, with a lomowall spanning across the walls and floor. A book about the Lomo LC-A was also launched at the convention, along with a montage of lomographs from around the world.
The Lubitel+ was also introduced, as a reproduction of the original two lens Lubitel.
The photographic techniques, cross-processing and redscaling, were made more accessible with the launch of two new films - the Lomography Redscale and Lomography X-Pro film.
2009
The website was updated further, with more scope for socialising within the community and more information about analogue photography.
A new shop was opened in New York City.
Dianalogues: Through A Woman's Lens was published, a book produced in collaboration with Lomography and colette - a Parisian boutique. It is told from a women's perspective, featuring lomographs taken by women.
The Lomo LC-A+ 25th Anniversary camera was released, celebrating 25 years since the original camera was introduced.
The Diana World Tour also began, exhibiting lomographs from around the world.
2010
Another lomography convention was held at Photnika in Cologne.
The award winning Spinner 360 was released, as well as the Sprocket Rocket, a camera which revolves around sprockets.
The Lomo LC-A+ White and Lomo LC-A+ Gold was introduced to tie in with the 25th anniversary.
Nine new gallery stores were opened worldwide, and the Diana World Tour was still in full swing.
Lomography introduced a new range of films, including 120 and 35mm formats and new X-Pro and Redscale films.
2011
Valentines Day Special cameras were introduced the 'I Love Lomo' Fisheye 2; the 'Take My Heart' Diana F+ and the 'Love Is In The Air' Diana Mini.
New T-shirt designs were introduced to the fashion range.
LomoLabs opened in the UK and the USA, so people could get their varied films developed more easily.
Three special camera editions were released, with proceeds going to The Red Cross of Japan: 'The Jiyu' Diana Mini; 'Kirameki' Diana F+ and the 'Shiawase' Fisheye 2.
In Hong Kong hundreds of thousands of people turned up to the Lomography Times Square Exhibition and witnessed a LomoWorldMap. A limited edition called the White Sprocket Rocket was introduced to celebrate the event.
The Lomo LC-Wide was also released this year, the widest lens compact camera in the Lomography range.
Two new films were released: the Lady Grey 120, Early Grey 35mm and Lomography X Tungsten 35mm film, meaning more choice for people using film.
There was also the launch of the LC-A+ Russia Day, a camera wrapped in red leather.
Several cameras got a colour makeover including the Sprocket Rocket, Diana F+, Diana Mini and Fisheye 2. The La Sardinia camera range expanded with the addition of four more editions.
2012
A new Fisheye camera and Lomokino Smart Phone Holder was released this year. The Spinner 360 was improved with a motorised spinner. A range of Animal Edition cameras were introduced, including the Diana F+ Zebra, Diana Mini Leopard, Fisheye 2 Python, La Sardina Orinoco Ochre and Sapphire Serpent.
Camera Families
LOMO LC-A
The camera that started it all, this has been improved over the decades since the original. You can change the aperture setting, create easy multiple exposures, change the ISO up to 1600 and it even has a cable release thread.
Effect: vignettes; saturation; vivid colours; 'signature 35mm lomographic look'
Lomo LC-W
This is the only wide angle compact camera in the Lomo family, with a 17mm wide lens. You can take photos in a half frame, square format or full format by using a 35mm film.
Effect: vignettes; exaggerated colours
Belair
This versatile medium format camera allows you to take photographs in three different formats, has interchangeable lenses, and a wide selection of ISO ranges. You can create panoramas, multiple exposures and have automatic shutter settings.
LomoKino
This is the first Lomo analogue video camera. With it's easy to use aperture controls and ability to focus fast you can create short movies on a 35mm film.
Effect: lo-fi sound effects
La Sardinia
This 35mm wide angle lens camera is shaped like a sardine tin. It comes in over 30 designs, and has had several limited edition specials.
Diana F+
A classic reproduction of the 1960s camera, the Diana F+ shoots in 120 format and has a light-weight plastic build making it easy to take anywhere. With different accessories you can have a flash; different lenses and an instant back to see your photos as soon as they happen. There are so many different variations and designs, such as the Diana Multi Pinhole Operator and the Diana F+ Glow in the Dark.
Effects: soft focus; vignette.
Diana Mini
A mini verson of the Diana F+, you can take photos in either half frames or square shots, producing interesting, whimsical images. They come in a variety of colours and designs, so there is plenty to choose from!
Effect: lo fi; bulb setting (for long exposures)
Sprocket Rocket
As the name implies, the panoramic photos you take with a 35mm include the sprockets of the film, due to the incredibly wide lens! Lomography introduced a range of SUPERPOP! Sprocket Rockets which come in an array of vivid colours.
Fisheye
There are three variations of the Fisheye camera. Fisheye One lets you take photos; Fisheye 2 allows this along with the ability to do multiple and long exposures; Fisheye Baby 110 is a smaller version taking 110 film, and they all do this with a 170 distortion.
Spinner 360
This camera allows you to take photos with s 360 panorama, just by pulling a cord which spins it round.
Multi Lens
Lomography have a range of multi lens cameras including the ActionSampler, SuperSampler and the Pop 9. Multiple lens allow for sequential photos with different shutter speeds, to get a sense of movement.
Lubitel
A Russian classic, this medium format camera has two lenses and are a collectible item.
Holga
One of the more popular lomography cameras, they range from medium format; twin lenses; stereo; pinhole and 35mm film editions.
Effects: lofi; soft focus; colour filiters; light leaks;
Pinhole Cameras
Lomography have a range of pinhole cameras, from DIY cardboard cameras to Diana and Holga versions. This way you can create images without using a lens, but with just a pinhole.
The Film
Choosing the film is an important part of lomography, as they can produce incredibly different effects.
Film Formats
35mm
This is the most common film you can buy, with supermarkets and shops selling them. You can use these in most cameras, and they come in either black and white or colour. They have holes on them to fit within the sprockets, and when you use them with a larger format camera, the image will reach past these edges creating an interesting effect.
120mm
This fits in medium format cameras like the Holga or the Belair, and because produce square images. As they are bigger than other formats, they have higher quality images, with great attention to detail.
110mm
Having been reintroduced in 2012 by Lomography, these are small films allowing the world to be seen in a new perspective. They work with cameras such as the Diana Mini or the Fisheye Baby.
Film Types
Colour negative
This is the most common type of film, and can be brought and processed in C-41 chemicals at pretty much any pharmacy or photography shop. Perfect for taking everday photos, capturing exactly what you see in front of you.
Slide film
Also a colour film, the effect of the images when developed are more saturated and vivid than regular colour negative film. Although usually developed in E6 chemicals, you can still use the C-41 chemical process to achieve surreal, random results.
Black and white
A great alternative to colour film if you want to go for the true analogue look, perfect for monochromatic contrasts and different tones.
Redscale
Lomographers first started this technique by loading film backwards so that images were shot onto the semi-transparent side of the film. This created warm tones of colour, in reds, oranges and yellows. Now Lomography has created a range of redscale films where the film is already loaded backwards.
Cross processing
This is a processing technique whereby you develop slide film using the same chemicals as you would for colour negative film. This creates vivid and saturated colours, with each time producing a different result which makes it so unique.
Expired film
Films have an expiry date, but once they have past it, they create effects that lomographers love. The reason films have an expiry date is because when they are in production, they are made to be a certain speed like ISO 400. However, certain conditions can affect this when making its way to the consumer like humidity, lighting or temperature. Meaning when it reaches you, the ISO might actually produce images as though it was a lower speed like ISO 200. When it reaches past the expiry date, the manufacturer can't be held responsible for any random effects which appear on the images once developed. The important thing to remember is to shoot on a sunny day, and the effects vary each time, which range from colour shifts to grainy images.
The Experiments
Here are some photographs that can be taken with a range of Lomography cameras: Holga; Holga Tim; Fisheye and ActionSampler.
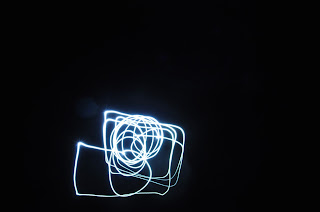
As I wanted to experiment with lightpainting, I decided to try it out digitally first to see how long to expose it for, what lighting I would need etc.
For the previous attempts I was using glowing cubes which produced a blurry effect, but then I started to use the flashlight on my phone which produced a sharper, brighter effect.
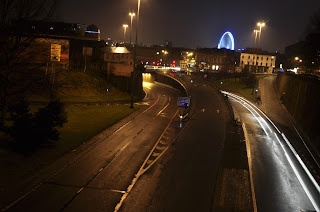
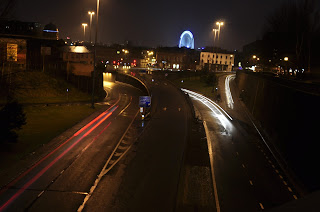
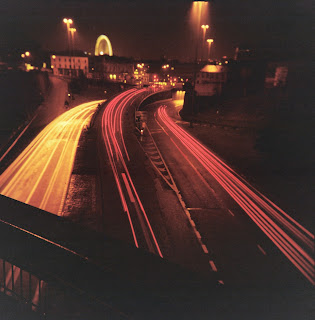
I then looked at long exposures with traffic:
I also experimented digitally with long exposures:
Here are the photos I took with the Holga:
Here are the photos I took with the Holga Tim:
Here are the photos I took with the Actionsampler:
Here are the photos I took with the Fisheye:
Illustrations
Here are the camera illustrations that I made:

I changed the colour of them to all the colours that are featured on the website.
Net
Here are some drawings of patterns. I wanted to incorporate the style of the La Sardina designs into it.
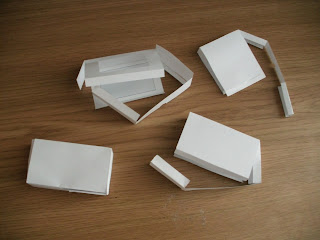
Here is the net for my pinhole camera:
Page Layout
Here are screenshots and development of when I went onto InDesign. I decided the paper size around how big the net will be.
Perforated Pages
I spoke to woodwork about making the wooden bookcovers, and he suggested having perforated pages instead so the net can be within the pages. I think that this is a better idea, so I am going to do this instead.
Presentation
We had to present our work so far to some peers and a tutor, so here it is:
I also needed to include three photographs that weren't my own because I didn't use an expired film, I don't have a 110mm format camera, or a instant film camera. I found them on lomography.com:
The feedback I got was really constructive, Fred said that I should condense my work as it is too much to fit in one book, and think about what the interesting parts are.
As I think all the information is relevant, what I am going to do is create separate publications and package it, so each section is divided better. I want to have a book with the camera, film and photographs in so that you can see what you can do, and how to achieve it; a booklet of the make your own pinhole camera kit and a fold out poster with the timeline on it.


